Installing a Xantrex XW – part 1

Written by brad on December 29th, 2009

We are completely off grid. Our Xantrex system comprises an inverter, a battery bank, and a solar array.

We got the Xantrex XW6048 inverter as the brains/workhorse of our solar-powered system. Part of the reason for going with this system (rather than pieces) is the same reason I wanted the guy doing our concrete slab also taking care of the plumbing in the slab–I don’t want any finger pointing. Also, Xantrex has a great reputation. I think everyone around here that I have visited (on my tour of places using solar power) had a Xantrex inverter and they all seemed quite happy.

I searched the web for “Installing a Xantrex XW” and found nothing – nothing useful. I hope this will help others as I seem on my own… as far as the internet goes anyway. P.D. has been enormously helpful and I’m developing a small group of great people to ask questions of via email.

Xantrex gives you really great documentation. There’s a big bound manual and a color fold-out diagram/layout that shows many possible configurations-grid tied, off-grid, single or multiple inverters, etc. It all seems a bit over my head, but I think I can work through it.

As for the rest of the system, we got the Control Panel, which lets you configure and monitor all the different parts of the system from one panel, theĀ  Power Distribution Panel, the Solar Charge Controller, and the Automatic Generator Start. I’m sure we will need some additional parts to get it running, but was a ready to begin.

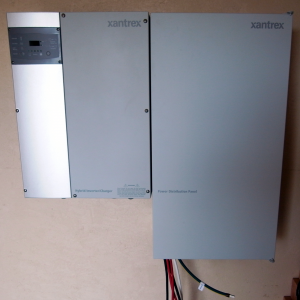
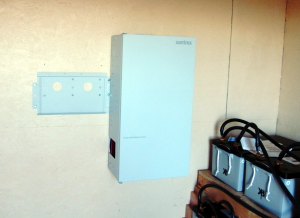
The first matter at hand is mounting the equipment. The inverter weighs something like a hundred-thirty pounds. You don’t want to fool around with this. They give you a really solid mounting plate for both the inverter and the Power Distribution Panel (hence forth know as the, PDP).

The Inverter and the PDP mounted

The Inverter and the PDP mounted


Wiring the solar panels done

Written by brad on December 28th, 2009

At least until I get the energy or desire to install the next six panels. We should have plenty of power for construction with six panels.

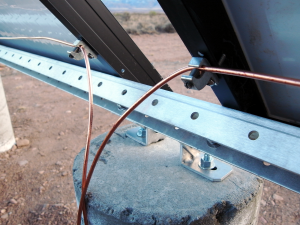
Today, we grounded the solar panels.

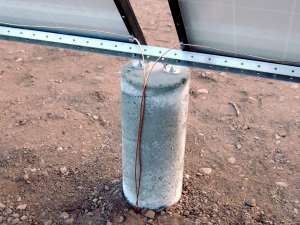
Ground wires attached

Ground wires attached

Close up of grounding lugs attached to the solar panels

Close up of grounding lugs attached to the solar panels

We also finished running the conduit from the combiner box to the battery house. Into the conduit went the hot, neutral, and ground wires from the combiner box which will hook up to the charging unit of the inverter. I also made a small change based on a recommendation from P.D.; I wrapped white tape around the two negative leads coming from the solar panels. I meant to do that just because it made clear which wires were hot and which were negative, but once they were in place, I forgot.

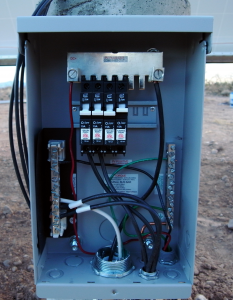
Wiring complete

Wiring complete

The inside cover is back on

The inside cover is back on

Buttoned up

Buttoned up

Next we’re going to work on getting the inverter up and running. The first step is mounting it. It’s a hundred and thirty pounds so it needs a solid mount. I put six 3 inch lag bolts into studs to hold it, plus quit a few sturdy screws into the OSB. It’s not going any where.

Mounting the inverter

Mounting for the inverter


Wiring the solar panels

Written by brad on December 26th, 2009

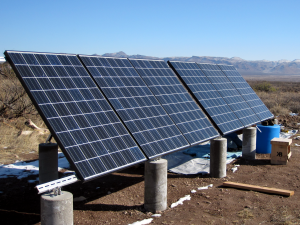
The first row of solar panels is installed. It’s time to look at wiring them together.
Finished

Finished

Each solar panel (data sheet, installation manual) has two cables on the back, one with a male connector and the other with a female connector. You can connect solar panels together (in series) with these cables. The more panels you connect together the greater the voltage. Because you need to have circuit breakers between the solar panels and the inverter/battery charger, you need to keep the voltages down to a level that’s reasonable for your DC breaker.
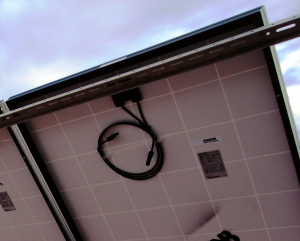
The power cables

The power cables

Our breakers can handle up to 150 volts. We will wire in groups of three panels which generates about 100 volts.

After you have connected your panels together, you’re left with one male and one female connector. One of these is positive and one is negative. These need to be connected to the combiner/breaker box. With our purchase, we got four 30 foot cables with the same connectors as the solar panels. What you do, is cut these in half (or so, depending on your arrangement) and use the two pieces to connect the solar panels to the breaker box. The end with the connector attaches to the solar panel, you strip the wire on the other end and hook it up in the combiner box. One very nice thing about this arrangement, is that you can wire the cables to the breaker box before you plug into the solar panel. This is very nice because solar panels can’t be switched off if it’s sunny.
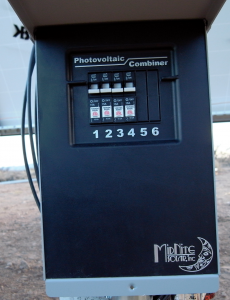
midnight-breakerbox

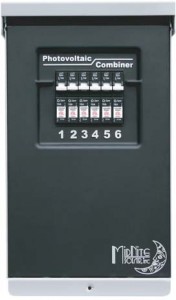
Midnite Solar MNPV6 Solar Array Combiner

The combiner box we are using is from Midnight Solar. We will use four of the available six spots for circuit breakers. If we ever find that we need to get more solar panels, all we need to do is add some breakers and we’re ready to go.

It turns out that this combiner box needs some assembly. That’s because it was designed for a variety of uses. It was pretty simple to figure out what we needed, but it was hard for me to figure out how it fit together.

There is a plate that the breakers fit into that looks like it mounts in the box; it doesn’t. It kind of hangs in the air. The breakers have a screw in the back that clamps down on the plate. Once you get a few breakers installed, it’s quite secure. This plate supplies the combined (in parallel) power of all the solar panels to the battery charger.

I have a DC lightning arrestor that will be installed in the combiner box. It connects to ground, neutral, and the combined DC output. (We actually have a variety of lightning arrestors that will go throughout the system.) I don’t really know how much protection things like this provide, but considering the lightning I’ve seen here so far, it seems worth trying.

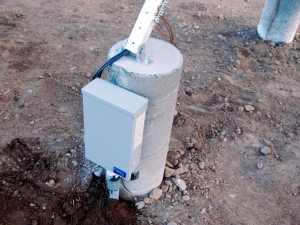
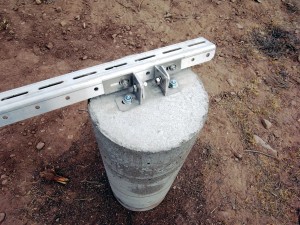
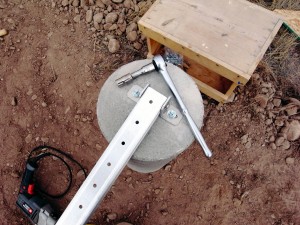
As for grounding the panels and combiner box, I put a grounding rod into the ground (eight feet down) inside of the center back concrete column. Bare copper wire is running from the grounding rod out of the column. I’ll use this to ground all the solar panels and the combiner box. (We had to order special little connectors that attach the grounding wire to each of the solar panels.)

There was a brief hiccup before we actually wired the solar panels to the combiner box. Someone asked a question regarding the rated amps (15 amps) for for the breakers and the amps coming from the solar panels. The case is that when you connect panels in serial, the voltages add and the amps stay the same. (If you combine in parallel, the amps add and the voltage stays the same.) So, the circuit breakers we have are fine.

The wiring in pictures… Click to continue »


Let it snow!

Written by karen on December 23rd, 2009

We woke up to 3+ inches of snow this morning! And then by afternoon, most of it was gone.

Full size pics here


Wiring batteries for solar power

Written by brad on December 23rd, 2009

I am no artist.

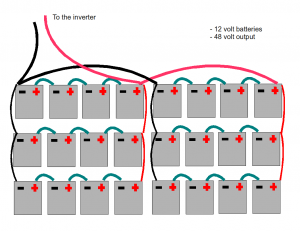
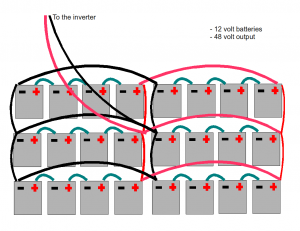
Unfortunately, the only way I could understand how to wire our batteries together was to draw a picture. Open Office has a nice drawing program. Despite its niceness, my drawing is not attractive. I think though that it’s accurate and it’s nice to have as documentation.

On a side note: Our blog is surprisingly nice for documentation. The other day I had to look up the pay load for the truck (hauling bags of cement) and it couldn’t have been easier.

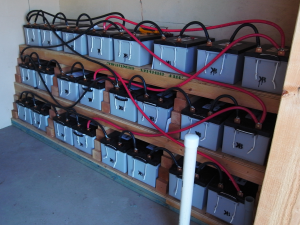
This is the physical layout as well

This is the physical layout as well

The idea here is to create one giant 48 volt battery from a bunch (24) of 12 volt batteries.

The process is to wire the batteries together both serially and in parallel. Groups of four batteries are wired together in series to get up to 48 volts. (In the picture, this is the little wires that go from positive to negative.) The blocks of 48 volts are wired together in parallel to create the giant battery. (In the picture, the red and black wires are in parallel.)

giant-battery

Not according to plan, but electrically correct

Yes, as Karen pointed out, not according to plan. I confess that when I bought all the solar equipment I didn’t understand exactly how it all went together. I can’t imagine what I was thinking. I didn’t have the right cables to follow my plan. I was going to order the right cables when I realized I could use what I had. Instead of linking each block together with the one above it, I link it with the one above and across. It’s the same electrically, but a little funky.

Battery details:

Sun Xtender PVX-2580L AGM Sealed Battery

Volts: 12

Amp hours: 255

This is an addendum to my original post. The battery wiring went through a little reworking. This is the final physical layout. I wouldn’t have added the horizontal wiring; however, since I had them I used them to insure the lowest possible resistance.

The final physical configuration

The final physical configuration

The wires between the batteries are 2/0 and the ones going to the inverter are 4/0.


Time permitting or time spent waiting for a lath inspection

Written by brad on December 22nd, 2009

The inspector didn’t arrive until late this afternoon. There were fewer questions by the inspector about this inspection than any one so far. We passed, and it’s on to stuccoing. Once, that is, the threat of rain (and snow) has passed.

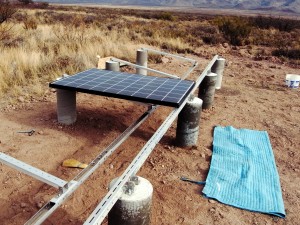
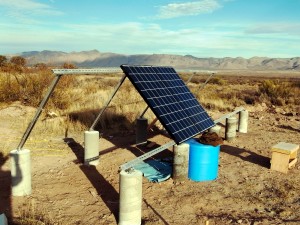
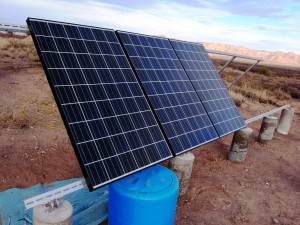
While I was waiting, I buckled down and got to work on the solar panel mounting. I got four of the first six panels up before it got dark.

The front edge bolted down

The front edge bolted down

The first of the back edge posts attached

The first of the back edge posts attached

Close up

Close up

Making progress on the back edge

Making progress on the back edge

The back edge is ready for the solar panels

The back edge is ready for the solar panels

Positioning the first panel on the front edge

Positioning the first panel on the front edge

Two panels up

Two panels up

Three panels up

Three panels up

Four panels up

Four panels up

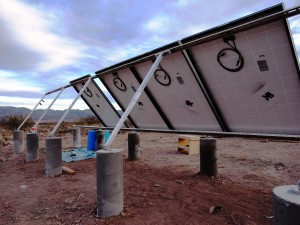
A picture of thebackside

A picture of thebackside

I don’t really love the mounting hardware, but I’m not sure how I’d do it differently. It relies completely on the solar panel itself for lateral strength. I wonder if some kind of X bracing is in order.

Thanks for the help with this Douglas!


We passed!

Written by karen on December 21st, 2009
 

Time permitting…

Written by brad on December 20th, 2009

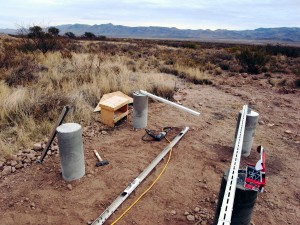
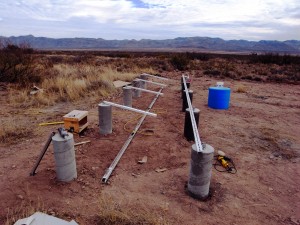
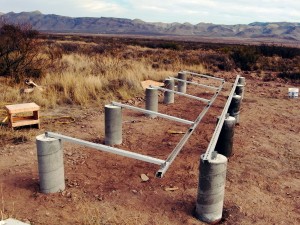
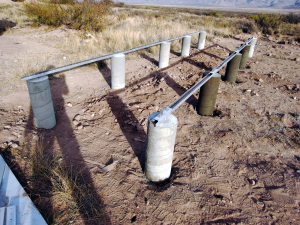
We will get the first solar array up and running. The columns are poured and ready to go.

Our focus will remain on stucco for Tumbleweed; however, spare moments will likely go into solar power.

columns-finished


What a difference a year makes

Written by brad on December 19th, 2009

When we first bought the ranch, I spent a lot of time looking at various maps, etc. of the area around our place. One day on Google maps I noticed that P.D.’s property is greener that the rest of the property around here. Just being greener isn’t too strange, but it’s also square–green and square. Talking to P.D., he said it was likely due to his place being fenced for twenty or more years. It is open range out here. There are not a lot of cattle, but I guess it doesn’t take a lot to change the landscape.

I never expected to see a change in such a short time, but it’s only been a year and already there’s a big difference inside our property from the outside.

fenced-unfenced

Looking at this picture, you would think cows graze around our fence all the time just looking for a way in. It’s not the case. Once in a great while, we see them near the fence. Still, you can see that when they do come by, they eat up most everything.


Another day, another power tool

Written by karen on December 19th, 2009

We got all the lath on, but ran out of staples to do the final nail-down. (We want it to be really tight to help with the stucco.) So, we had a day or two this week to work on other projects.

Brad worked on the columns for the solar, while I worked on the door for the battery house. I’m in charge of all the finishing.

Brad had suggested several times that I try his orbital sander, but I was reluctant. I did a lot of sanding when I was a kid (thanks, Dad, for the good training), and we always sanded by hand. I didn’t think any kind of power sander could do as well. But after many hours of hand sanding the door and some stubborn spots that I couldn’t quite work out, I decided to try the orbital sander.

Surprise — I liked it! (This is a pattern with Brad and I. He often suggests something for me to try — usually computer related — that I resist for many months and then think it’s great. Examples include a USB drive, IMAP, and Thunderbird.)

One thing I really like about the orbital sander is that you have a lot of control with it. It’s small and light (not unlike the palm nailer) and doesn’t feel like it might get away from you. The door (and table) is looking really good now.

We have an inspection on the lath scheduled for Monday. Keep your fingers crossed. This is the first inspection that I really feel like they’re looking at my work.